Overview of Hazelnuts and Their Versatility in Savory Recipes
Hazelnuts, with their rich and nutty flavor, are not only a popular ingredient in sweet confections but also a versatile addition to savory recipes. Their unique taste and texture make them a delightful ingredient that adds depth and complexity to a wide range of dishes.
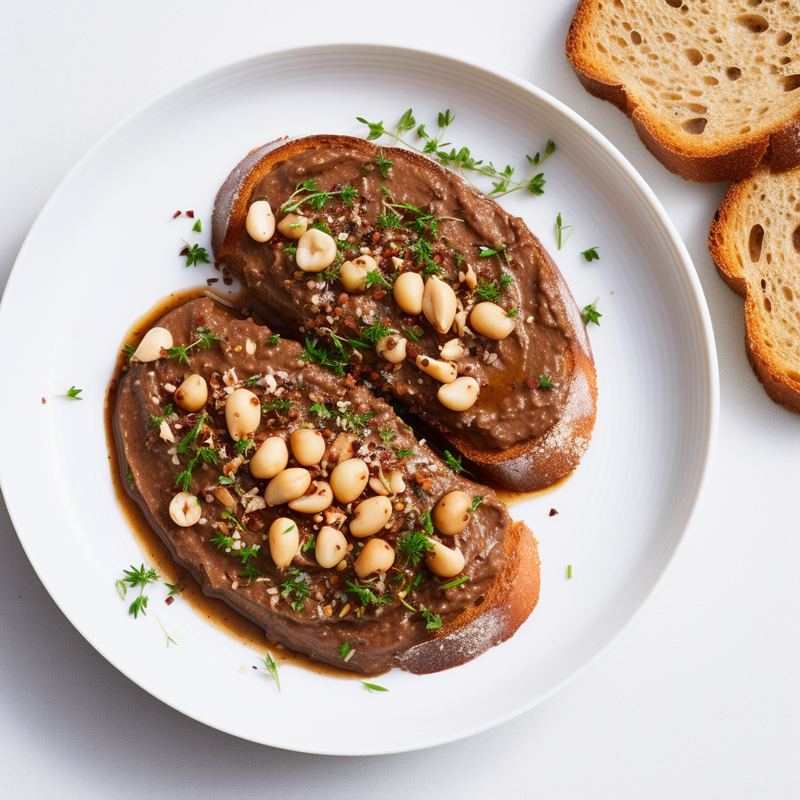
From sauces to spreads, toppings, and even crusted coatings, hazelnuts can be used in various ways to enhance the flavor and texture of savory dishes. They can be ground into a creamy paste to create delectable sauces or spreads, providing a smooth and velvety consistency. This makes them a great choice for accompanying meat, poultry, or vegetables, adding a delightful richness to the overall dish.
Additionally, hazelnuts can be used as a topping in salads, soups, and grain bowls, adding a delightful crunch and enhancing the presentation of the dish. Their versatility extends to crusted coatings as well, where they can be combined with other ingredients like breadcrumbs or herbs to create a crispy and flavorful coating for meats or vegetables.
The flavor profile of hazelnuts is often described as earthy, buttery, and slightly sweet. These characteristics make them versatile enough to be paired with a wide range of ingredients, both savory and sweet. They work particularly well with ingredients like garlic, lemon, rosemary, and Parmesan, providing a well-rounded and aromatic flavor combination.
In conclusion, the versatility of hazelnuts in savory recipes cannot be understated. Their ability to enhance sauces, spreads, toppings, and crusted coatings adds a unique depth of flavor and texture to a variety of dishes. Whether used as a creamy spread or a crunchy topping, hazelnuts have become a favorite ingredient among chefs and home cooks alike, providing endless possibilities for creative and delicious recipes.
Introduction:
Roasted hazelnuts are not only a culinary delight but also a healthy and versatile ingredient that can be incorporated into a wide variety of dishes. Whether you are looking to add some crunch to your salads, enhance the flavor of your desserts, or create a delicious and nutritious snack, roasted hazelnuts can be your go-to ingredient. In this article, we will explore some mouthwatering roasted hazelnut recipes that are sure to please your taste buds and impress your friends and family. From savory roasted hazelnut pesto to sweet and decadent hazelnut truffles, these recipes will demonstrate the culinary possibilities that this humble nut can offer. So, get ready to tantalize your senses and discover new ways to enjoy the rich and nutty flavor of roasted hazelnuts.
To prepare Roasted Hazelnut and Herb Crusted Chicken, begin by preheating the oven to 375°F (190°C).
Next, take a handful of roasted hazelnuts and place them into a food processor. Pulse until the hazelnuts are finely chopped. Transfer the chopped hazelnuts to a bowl and add in a mixture of your favorite fresh herbs such as parsley, basil, rosemary, and thyme. Mix the herbs in with the chopped hazelnuts until well combined.
Take boneless, skinless chicken breasts and pat them dry with paper towels. Season the chicken breasts with salt and pepper, then coat them in a thin layer of Dijon mustard. The mustard acts as a binder for the hazelnut and herb crust.
Next, dip the coated chicken breasts into the hazelnut and herb mixture, pressing the crust onto both sides of the chicken to ensure even coverage. Place the coated chicken breasts onto a baking sheet lined with parchment paper or aluminum foil.
Bake the Roasted Hazelnut and Herb Crusted Chicken in the preheated oven for approximately 25-30 minutes, or until the chicken is cooked through and the crust is golden brown and crispy.
Once cooked, remove the chicken from the oven and let it rest for a few minutes before serving. The combination of the roasted hazelnuts and herbs in the crust adds a delicious texture and flavor to the chicken, making it a flavorful and satisfying dish.
Ingredients needed:
1. 200g white chocolate
2. 300ml whipping cream
3. 200ml condensed milk
4. 100g hazelnut butter
5. 1 tablespoon cream
In order to prepare the recipe mentioned in the background information, you will need the following ingredients: white chocolate, whipping cream, condensed milk, hazelnut butter, and cream.
Firstly, you will need 200g of white chocolate. This sweet and creamy ingredient will provide a rich flavor to the recipe.
Next, you will require 300ml of whipping cream. This ingredient will add a smooth and velvety texture to the final dish.
To enhance the sweetness and consistency, you will need 200ml of condensed milk. It will also contribute to the overall richness of the dessert.
To add a nutty and flavorful element, you will need 100g of hazelnut butter. This ingredient will provide a delicious taste and delicate crunch to the dish.
Lastly, you will need 1 tablespoon of cream. This ingredient will further enhance the creaminess of the recipe and ensure a smooth finish.
By combining these ingredients, you will be able to create a delectable dessert that perfectly incorporates the flavors of white chocolate, whipping cream, condensed milk, hazelnut butter, and cream.
Cooking Instructions:
Cooking instructions are step-by-step guidelines or procedures that need to be followed in order to prepare a specific dish or meal. These instructions provide a clear and systematic approach to cooking, ensuring that the desired result is achieved. Whether it is a gourmet recipe or simple everyday cooking, following the cooking instructions is crucial to ensuring that the dish turns out as intended. From prepping the ingredients to the final plating, each step is carefully laid out to guide the cook through the cooking process. By following these instructions, even novice cooks can create delicious and satisfying meals. Additionally, cooking instructions often include information on cooking techniques, seasoning, and timing, offering helpful tips and suggestions to enhance the flavors and presentation of the dish. So, whether you're a seasoned chef or an amateur cook, mastering the art of following cooking instructions is key to successful culinary endeavors.
To create a flavorful Roasted Hazelnut and Vegetable Quinoa Bowl, start by preheating your oven to 350°F (175°C) and spreading a handful of hazelnuts on a baking sheet. Roast the hazelnuts for about 10 minutes or until they turn golden brown, then remove them from the oven and allow them to cool.
While the hazelnuts are cooling, prepare the quinoa according to the package instructions. Rinse the quinoa thoroughly to remove any bitter taste, then cook it by combining 1 part quinoa with 2 parts water or vegetable broth. Bring the liquid to a boil, then reduce the heat, cover the pot, and simmer for about 15 minutes until the quinoa is tender and the liquid is absorbed. Fluff the quinoa with a fork and let it cool slightly.
Once the quinoa and hazelnuts are ready, it's time to prepare the roasted vegetables. Chop bell peppers, zucchini, and cherry tomatoes into bite-sized pieces and toss them with olive oil, salt, and pepper. Spread the vegetables evenly on a baking sheet and roast them in the preheated oven for about 20-25 minutes until they are tender and slightly caramelized.
In a large bowl, combine the cooked quinoa and roasted vegetables. Stir gently to mix them together and allow the flavors to meld. To make a homemade dressing, whisk together olive oil, lemon juice, minced garlic, salt, and pepper. Drizzle the dressing over the quinoa and vegetable mixture, tossing again to ensure everything is well coated.
Finally, rough chop the roasted hazelnuts and sprinkle them on top of the quinoa bowl for added crunch and flavor. Garnish with your choice of fresh herbs, such as parsley or cilantro.
Serve the Roasted Hazelnut and Vegetable Quinoa Bowl as a delicious and nutritious main dish or side. The roasted hazelnuts add a delightful nutty flavor, while the combination of roasted vegetables, bell peppers, zucchini, and cherry tomatoes provides a variety of textures and tastes. Enjoy this hearty and satisfying meal bursting with wholesome ingredients and vibrant flavors.
For the next heading, the ingredients needed include milk chocolate, white chocolate, whipping cream, pannafix (optional), and condensed milk.
To create a decadent treat, you will require 80g of milk chocolate. Milk chocolate has a smooth and creamy texture that adds richness to the overall flavor of the dessert. Additionally, you will need 200g of white chocolate, which provides a sweet and delicate taste to balance the richness of the milk chocolate.
A crucial component of this dessert is the 500ml of whipping cream. Whipping cream adds a light and airy texture, creating a velvety smoothness that is delightful to the palate. To enhance the texture further, you may choose to include 1 sachet of pannafix. This optional ingredient acts as a stabilizer, ensuring that the dessert retains its shape and consistency.
Lastly, incorporating 1 can of condensed milk is essential. Condensed milk not only adds sweetness but also contributes to a lusciously creamy and thick consistency. Its presence amplifies the overall flavor profile, making the dessert irresistibly delicious.
With these key ingredients - milk chocolate, white chocolate, whipping cream, pannafix (optional), and condensed milk - you are well on your way to creating a delectable treat that is sure to satisfy any sweet tooth. Whether you are preparing a special occasion dessert or simply indulging in a delightful treat, these ingredients will ensure your creation is absolutely delectable.
Cooking Instructions:
1. Preheat the oven to 350°F (175°C) and position the rack in the center of the oven.
2. In a large mixing bowl, prepare the muffin batter according to the recipe, mixing all the dry ingredients together and then adding the wet ingredients. Ensure the batter is well combined.
3. Line a muffin tin with paper liners or lightly grease the muffin cups to prevent sticking. Spoon the batter evenly into each cup, filling them about two-thirds of the way full.
4. Carefully place the filled muffin tin in the preheated oven. Bake the muffins at 350°F (175°C) for approximately 12-15 minutes or until a toothpick inserted into the center comes out clean. Avoid opening the oven door too frequently during baking as it may affect the muffins' rise and texture.
5. Once the muffins are baked to perfection, remove the tin from the oven and transfer it to a heat-resistant surface. Allow the muffins to cool in the tin for a few minutes.
6. After a brief cooling period, gently remove the muffins from the tin and transfer them to a wire rack to cool completely. This ensures that the bottoms do not become soggy and that they cool uniformly, retaining their fluffy texture.
7. Let the muffins cool completely on the wire rack before serving. Serve them warm or at room temperature and enjoy!
Note: Baking time may vary slightly depending on your oven, so keep a close eye on the muffins towards the end of the baking time to prevent over-baking.
Raw Hazelnut Recipes:
Hazelnuts are a nutritious and versatile nut that can be enjoyed in a variety of ways. Whether you're looking for a healthy snack, a delicious dessert, or a flavorful addition to your meals, there are countless raw hazelnut recipes to try. From simple and easy options like roasted hazelnuts with sea salt to more elaborate dishes such as raw hazelnut brownies, the possibilities are endless. In this article, we will explore some delicious raw hazelnut recipes that will satisfy your cravings and provide you with the many health benefits this nut has to offer. So grab a bag of hazelnuts and get ready to embark on a culinary adventure that will leave your taste buds delighted and your body nourished.
Next Heading: Raw Hazelnut Pesto Pasta
Raw Hazelnut Pesto Pasta is a delightful dish that combines the rich flavors of raw hazelnuts with the freshness of basil, garlic, and olive oil. This simple recipe is not only incredibly delicious but also packed with nutritional benefits.
To make this mouthwatering pasta, you will need a few key ingredients. First, gather a cup of blanched hazelnuts, which can be easily obtained from your local grocery store. These nuts provide a rich and nutty base for the pesto sauce. Additionally, you will need a generous bunch of fresh basil leaves to infuse the dish with its aromatic essence. Garlic cloves will add a delightful pungency to the sauce, while olive oil will provide a smooth and silky texture. Finally, don't forget to include some freshly grated Parmesan cheese to give a salty and cheesy kick to the dish.
To create the raw hazelnut pesto sauce, simply blend the blanched hazelnuts, fresh basil, garlic, olive oil, and Parmesan cheese until smooth and creamy. You can adjust the consistency of the sauce by adding more olive oil if desired. Once the pesto is ready, toss it with your favorite cooked pasta, allowing the flavors to meld together.
This Raw Hazelnut Pesto Pasta is not only a feast for the taste buds but also a wholesome and nutritious meal. Hazelnuts are a great source of healthy fats, vitamins, and minerals, while basil adds a dose of antioxidants. The garlic and olive oil offer numerous health benefits, including potential immune-boosting properties and heart-healthy fats.
Enjoy this delicious and vibrant Raw Hazelnut Pesto Pasta for a flavorful and nourishing meal. Embark on a culinary adventure with this simple yet satisfying dish that will impress family and friends alike.
For the next heading, the ingredients needed to make the delicious and creamy chocolate hazelnut truffles are milk chocolate, white chocolate, whipping cream, pannafix (optional), condensed milk, and hazelnut butter/cream.
To start, you will need milk chocolate and white chocolate. Milk chocolate provides a smooth and creamy base for the truffles, while the white chocolate adds a hint of sweetness and extra richness. Choose high-quality chocolate for the best flavor.
Next is whipping cream, an essential ingredient for creating a velvety and luscious texture. The whipping cream is heated and combined with the chocolate, creating a silky ganache that will become the center of the truffles.
Optionally, you can use pannafix, a stabilizer that helps the whipped cream hold its shape. This ingredient is optional but can be useful if you want a firmer and more stable truffle filling.
To enhance the sweetness and add a distinct flavor, condensed milk is added to the mixture. This ingredient provides a touch of caramelized sweetness and helps bind the ganache together.
Last but not least is the hazelnut butter or cream. This ingredient adds a rich and nutty flavor that pairs perfectly with the chocolate. Look for a high-quality hazelnut butter or cream with a smooth and creamy consistency.
By incorporating these delicious ingredients, you will create decadent chocolate hazelnut truffles that are sure to impress.
Introduction:
Cooking instructions are an essential part of any recipe, providing clear and concise steps to follow in order to create a delicious final dish. Whether you are a seasoned home cook or a complete beginner in the kitchen, well-written cooking instructions can guide you through the entire process, from prep work to plating. By breaking down each step and highlighting crucial techniques, cooking instructions ensure that your culinary endeavors are a success. In this article, we will explore the importance of clear cooking instructions and how they contribute to the overall cooking experience.
Raw Hazelnut Salad with Lemon Vinaigrette is a refreshing and nutritious recipe that combines the bold flavors of raw hazelnuts with the tangy and zesty taste of lemon vinaigrette. This salad is not only delicious, but also packed with vitamins, minerals, and healthy fats.
To make this flavorful salad, you will need a handful of raw hazelnuts, which provide a rich and nutty crunch. In addition, you will need a mix of fresh greens, such as spinach, arugula, and romaine lettuce, which add a vibrant and leafy base to the salad.
To make the lemon vinaigrette, you will need fresh lemon juice, extra virgin olive oil, a clove of garlic, salt, and pepper. The lemon juice adds a tangy and citrusy flavor to the salad, while the olive oil creates a smooth and velvety texture.
To assemble the salad, start by washing and drying the salad greens thoroughly. Then, roast the raw hazelnuts lightly in a pan until they become fragrant. Allow the hazelnuts to cool before roughly chopping them.
In a small bowl, whisk together the lemon juice, olive oil, minced garlic, salt, and pepper to create the lemon vinaigrette.
Next, toss the salad greens with the lemon vinaigrette in a large bowl until well coated. Sprinkle the chopped hazelnuts over the top of the salad for added crunch and flavor.
Serve the Raw Hazelnut Salad with Lemon Vinaigrette as a side dish or a light lunch. Enjoy the nutty goodness and refreshing taste of this simple and satisfying salad.
To create a delectable treat with a delightful balance of flavors, a few key ingredients are necessary. For this recipe, we require milk chocolate, white chocolate, whipping cream, pannafix, and condensed milk.
Starting with the chocolate, it is essential to have both milk chocolate and white chocolate to achieve a harmonious blend. The milk chocolate adds a smooth and creamy texture, while the white chocolate imparts a hint of sweetness. These two types of chocolate work together to create a decadent base for our dessert.
Next, we need whipping cream to provide a luscious and airy consistency. The cream contributes to the richness of the dish and enhances the overall creaminess of the final product. It adds a velvety texture and balances the sweetness of the chocolates.
To ensure the perfect consistency and stability of our dessert, a small amount of pannafix is required. Pannafix serves as a stabilizer and emulsifier, helping the mixture to set properly and preventing the separation of ingredients. It plays a crucial role in creating a smooth and creamy consistency.
Lastly, condensed milk acts as a sweetener and provides additional creaminess to our creation. The condensed milk intensifies the flavors of the chocolates and adds a smooth, silky texture.
In conclusion, to prepare this sensational treat, be sure to gather milk chocolate, white chocolate, whipping cream, pannafix, and condensed milk. With these ingredients at hand, you will be ready to embark on a journey of chocolatey bliss.
Preparation instructions:
To prepare this delicious recipe, you will need the following ingredients and measurements:
- 2 cups of all-purpose flour
- 1 teaspoon of baking powder
- 1/2 teaspoon of salt
- 1/2 cup of unsalted butter, softened
- 1 cup of granulated sugar
- 2 large eggs
- 1 teaspoon of vanilla extract
- 1/2 cup of milk
In addition to the ingredients, you will also need the following utensils and equipment:
- Mixing bowl
- Whisk or electric mixer
- Spatula
- 9-inch round cake pan
- Oven
Now, let's move on to the sequential steps to prepare this delicious recipe:
1. Preheat the oven to 350°F (175°C) and grease the cake pan with butter or cooking spray.
2. In a mixing bowl, whisk together the flour, baking powder, and salt until well combined.
3. In a separate bowl, cream together the softened butter and sugar until light and fluffy.
4. Beat in the eggs, one at a time, followed by the vanilla extract.
5. Gradually add the dry ingredients to the butter mixture, alternating with the milk. Begin and end with the dry ingredients.
6. Mix until just combined, being careful not to overmix.
7. Pour the batter into the prepared cake pan and smooth the top with a spatula.
8. Bake in the preheated oven for 25-30 minutes, or until a toothpick inserted into the center comes out clean.
9. Remove from the oven and let the cake cool in the pan for 10 minutes.
10. Then, transfer it to a wire rack to cool completely before frosting or serving.
Following these sequential steps will result in a moist and flavorful cake that is sure to impress your family and friends. Enjoy!
 Author: Gabby Games